

Homemade jams and preserves are delicious, but they take hours my garden demands I spend weeding and harvesting. As I explain this week in my Twice as Tasty column for the Flathead Beacon, freezing homegrown fruit lets me keep up with the harvest and save that haul to preserve in a different way when I have more time. Two-step preserving may seem like extra work, but it’s really a time saver when that second process needs some dedicated hours and focus, like canning jam and rolling up dried fruit leather.
Berries freeze particularly well for later preserving projects, as well as for smoothies, baked goods, and more. I always spread them on a tray for a first round of freezing to discourage clumping in the freezer bag. Again, what seems like extra work makes pulling out just a few berries for muffins or a galette so much easier. Even defrosting an entire bag for my nephew and niece’s favorite fruit leather flavors seems to happen more quickly if the berries haven’t frozen into a solid brick.
Learn more about making fruit leather and get my most requested flavors in my column.
 Make it, share it.
Tag @twiceastastyblog and #twiceastastyblog
Twice as Tasty
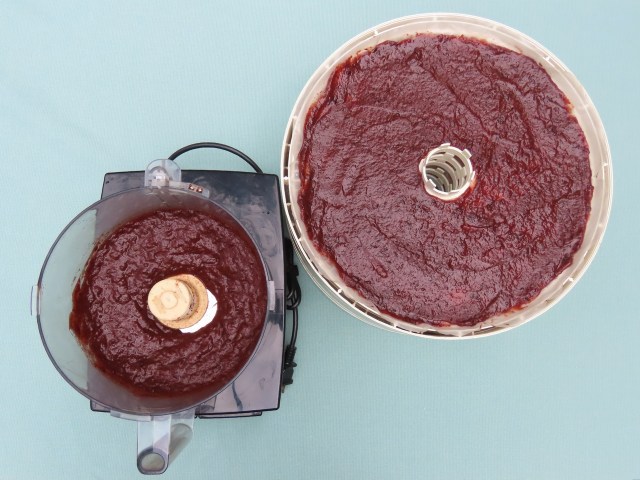
 Besides frozen berries, my fruit leathers rely on jars of homemade applesauce, either chunky and then pureed with the berries, like my grandmother made, or smoothed through a food strainer before canning, like my mom always did. Store-bought applesauce can be substituted, but if it is quite runny you may want to drain off some liquid or plan on an extended drying time.
When you’re making fruit leathers, a few of these tips and tricks may come in handy:
- The timing for drying fruit leather will vary with your machine, as will the shapes you produce. Drying time will also be affected by how thickly you spread the puree. So start by following your dehydrator’s user manual for a recommended timing, but check your batches regularly until you know what to expect. I know I can let my machine run overnight, but I check each batch every hour or so after that, rotating or pulling trays as needed, until it’s done.
- Dry fruit leather should be leathery, rather than saucy, to the touch, but you don’t want it so dry that it cracks and crumbles. Once you no longer see saucy spots, stop the dehydrator, let the fruit leather cool for about 15 minutes, and then try to peel it from the tray. If you still see gummy spots, restart the dehydrator and run it a bit longer. If you dry the fruit leather slightly too long, you may still be able to roll it warm. If it’s too crackly to roll, try crumbling it and drying it completely to sprinkle on hot cereal or other dishes and then start again with your fruit roll project.
- My dehydrator produces one fruit leather “donut” per tray, so I cut it into three or four pieces that have a bit of a crescent shape—my nephew and niece don’t mind that it’s irregular. If you have flat, square dehydrator trays, you can fill each tray from edge to edge and then cut it into squares or strips or make fruit leather “pancakes” for round rollups.
- I’ve used food-grade plastic cut into sheets or stiffer plastic dehydrator sheets with equal success and minimal sticking when drying fruit leather. If your finished fruit leather tends to stick to the tray, try spreading a very light coating of sunflower or coconut oil on the tray before adding the puree.
- Fruit leather can be dried in the oven at a low temperature, but you’ll need to watch it even more closely, and rotate trays more frequently, to dry it evenly. Thicker layers of puree seem to work better when oven drying, but that may depend on whether your oven has hotspots.
Looking for other fruit leather flavors? You can find some in this blog post.
Want more Twice as Tasty recipes? Get my books! Click here to order a personally signed, packaged, and shipped copy of The Complete Guide to Pickling directly from me. I also share tasty ways to use pickles in The Pickled Picnic; it’s only available here.
Discover more from Twice as Tasty
Subscribe to get the latest posts sent to your email.

Pingback: Healthy & unique alternatives for halloween candy - Healthy Habit