

Even in my cold mountain climate, harvesting from the garden has begun. After a winter of eating home-preserved food, I’m ready to start savoring fresh produce in my meals—and of course squirrel away tasty morsels for next season.
In our current social climate, this may be the first time you’re growing your own food, focusing on eating locally grown food, and thinking of saving your harvest for future enjoyment. If so, welcome to the club! You’ll find various ways to eat and preserve many delicious foods on the blog. I’m also continuing my sourdough starter giveaway all month for those who want to enjoy freshly baked bread with their garden goodies. In this post, I highlight some of my favorite early garden treats: spring greens.
Mixing Greens
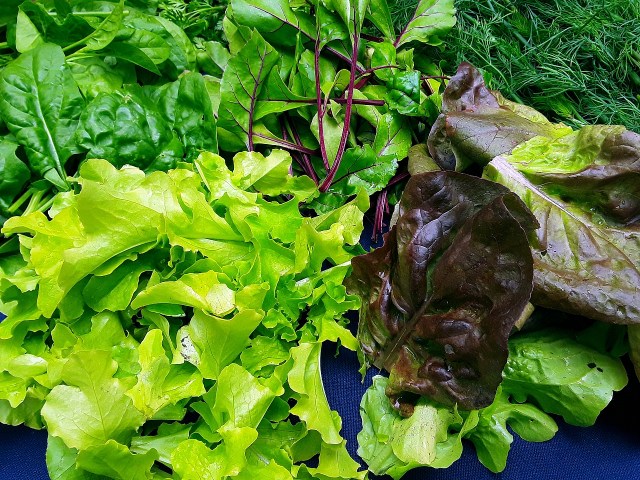
If you’re growing your own greens for the first time, you’re in for a real treat: Fresh-from-the-garden lettuces taste so much better than prepackaged and transported ones. Even the latest trend in greens—the plastic tub of salad mix—can’t stand up to leaves harvested the day you eat them. Large commercial growers, organic or otherwise, know this, so they’re using phrases like “baby greens,” “spring mix,” and the exotic-sounding “mesclun” (which means mixed greens) to help shape a belief that salad mix will be fresher and more flavorful than whole heads. The campaign is working: According to the Organic Produce Network, “Packaged salads are the single largest driver of organic dollars,” making up 20% of the market.
Don’t get me wrong: I love that stores and restaurants are offering more than iceberg and romaine and people are learning to enjoy the flavors of arugula, mizuna and other mustard greens, chard, radicchio, and other leaves. I love it even more when people discover that these greens taste better when locally grown and are easy garden plants. Lettuces grow well in the ground, in a pot on your patio or balcony, or even in a kitchen window. Seed companies and greenhouses have caught onto the mesclun trend and are selling premixed seed packets or mixed-salad starts: Just plant them and watch your own spring mix grow.
Harvesting Again and Again
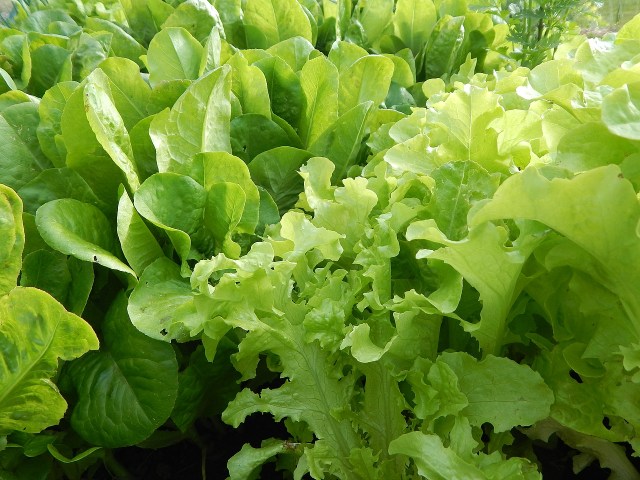
My favorite way to harvest mixed greens is the “cut-and-come-again” trick. As the plants grow, you can pluck just the outer, mature leaves or shear off the plant tops, leaving the bottom couple of inches of leaf and the roots in the ground. They’ll happily continue growing.
Spring greens aren’t the only plants you can treat this way. Use the same harvest technique—removing mature leaves and letting the rest continue to grow—with fully grown kale and chard, celery, scallions, and walking onions. Broccoli will continue putting out baby crowns after you’ve cut off the initial head. Herbs want you to keep cutting them back all season; the more you often cut, the more they produce.
Eating Your Harvest
Here are just a few spring green and herb recipes that are already on the blog; you can find more in the recipe index:
- Savory Herb Scones
- Spinach and Herb Frittata
- Scallion Pancakes with Chickpea Flour
- Grilled Asparagus with Yogurt-Dill Sauce
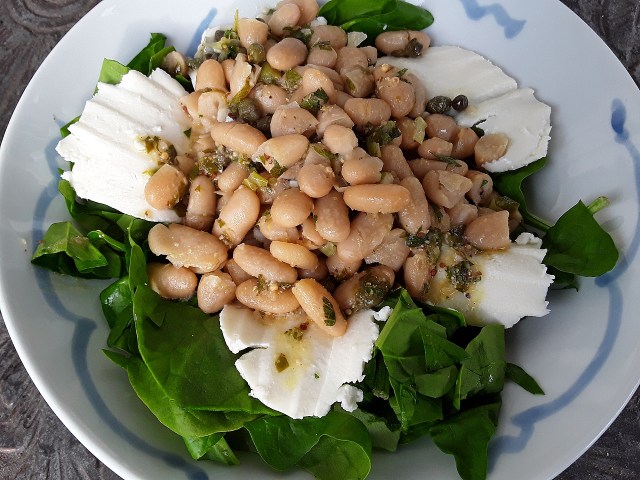
- Herbed Bean Salad with Fresh Mozzarella
- This concept of adding fresh greens to hot ingredients works with many variations: try spinach, kale (massaging the lemon into it), mustard greens, and herbs like sorrel and basil with the pasta. Cut the greens into strips and swap in quinoa, buckwheat, or another grain. Toss the greens with a hot, cooked protein, like shrimp, cubed chicken, or tofu, and serve it over rice. Or go grain-free by tossing the arugula or other green with roasted root vegetables.
- I always keep a head of roasted garlic in the fridge, but you can use fresh cloves instead. To reduce garlic’s raw sharpness, mix it into the lemon juice and let it sit while the pasta cooks.
- Even though the Parmesan will melt into the pasta, a little extra cheese never hurts. I just happened to have a hunk of my favorite stinky cheese—Cypress Grove’s Humboldt Fog—in the refrigerator when I photographed this recipe and couldn’t resist crumbling some on top.
- You can still make this recipe out of season if you set aside some of your spring harvest. Freeze basil as a pesto base and toss this with the pasta—or mince and freeze the arugula in the same way. Add dried fruit or sautéed mushrooms and boost the nuts or add sliced egg for a winter hot dish. Leftovers can be turned into a pasta salad; an extra squeeze of lemon and some fresh cheese will brighten the dish anew.
Of course, many of the ways I enjoy spring greens don’t need a recipe. Watch Twice as Tasty on Instagram in the coming weeks for #dailysalad posts. If you’ve joined the sourdough explosion, pile high the arugula, lettuce, spinach, and herbs after you’ve made bagels, pizza dough, or bread.
Storing Your Harvest

My favorite storage techniques for spring herbs and greens take little effort. Extra herbs can be dried, frozen in butter or cubes, or preserved in salt or sugar, all processes that need just a few minutes of effort. Arugula, spinach, and other greens can be treated like pesto base.
Twice as Tasty
 Arugula has become one of my favorite homegrown greens, especially when it first pops up in spring. I learned to love it in this salad when I lived in London, and I’ve been making this dish ever since.
Arugula, spinach, kale, and other hearty spring greens are delicious raw but can stand a little heat. Cook them too long, and they become a mushy stew I find unappealing. But wilting them into a hot dish, like pasta, lets their flavor and texture shine through. Even better, it takes little time and effort: Make the hot dish, stir in the fresh greens, cover with a lid and let them sit a couple of minutes. Dinner is done.
Ready to give it a try? Full details are in the recipe below, but here are the basics:
You need just 2 main ingredients plus lemon, garlic, and cheese.
1. Cook the pasta.
2. Mix in the arugula and other ingredients.
3. Top with extra cheese or nuts if desired and enjoy.
 Make it, share it. Tag your photos: @twiceastastyblog and #twiceastastyblog
Wilted Arugula Pasta
2 ounces arugula (about 2 cups)
Zest and juice of 1/2 lemon
1 tablespoon extra-virgin olive oil
2 cloves Roasted Garlic, chopped
1/4 cup grated Parmesan or other hard cheese, or to taste
Salt and freshly ground black pepper to taste
1/4 cup blue cheese (optional)
1 tablespoon toasted pine nuts or sliced almonds (optional)
Heat a large pot of water. Boil the pasta until al dente, following package instructions. In a large bowl, mix the arugula with the lemon zest and juice.
Drain the pasta, reserving 1/4 cup of the liquid. Return the hot pasta to the pot and quickly stir in the oil and garlic. Immediately add the arugula and hard cheese, tossing to combine. Put the lid on the pot and let it sit for 1–2 minutes, until the arugula wilts. Stir in some reserved liquid, if you want a saucy mix, and season with salt and pepper. Top with the soft cheese and nuts if desired.
Tips & Tricks
Need sourdough starter? You can request sourdough starter year-round in the Sharing fermented starters Facebook group. If you aren’t ready to bake with sourdough but plan to try other recipes, be sure to Join the Twice as Tasty Challenge by becoming a newsletter subscriber; click here to subscribe.
Discover more from Twice as Tasty
Subscribe to get the latest posts sent to your email.

just beautiful. inpsired me to have a healthy lunch
LikeLiked by 1 person